

How To Create A Scrolling Website Animation
How to Create a Scrolling Website Animation
Heads up: I use affiliate links for my fave products. If you click and purchase, I may receive a small commission at no extra cost to you.

Learn the easiest way to create a scrolling animation of your website. Perfect for showing your website off when you launch!
HIT PLAY OR READ THE POST BELOW:

video transcript:
How to Create a Scrolling Website Animation
Recently I redesigned my website and when I went to share it on Instagram, I did so with a fun little graphic like this:
When I posted that I got a ton of questions about how I did it. So that is what I'm going to show you in today's video.
If you're like, 'omg, I don't even have a website yet,' don't even worry. Building websites is what I teach over at louisehenry.com. If we haven't met yet, hi, I'm Louise. I put out new videos every single week, all about making the tech in your online business easier. So if that is something you could use a little bit of help with, subscribe to my YouTube channel here.
How to Create a Scrolling Website Animation
Step 1. Take a Screenshot of Your Website
The first thing you need to do is download the Chrome extension Full Page Screen Capture.
Once downloaded, click add to chrome and then add extension.
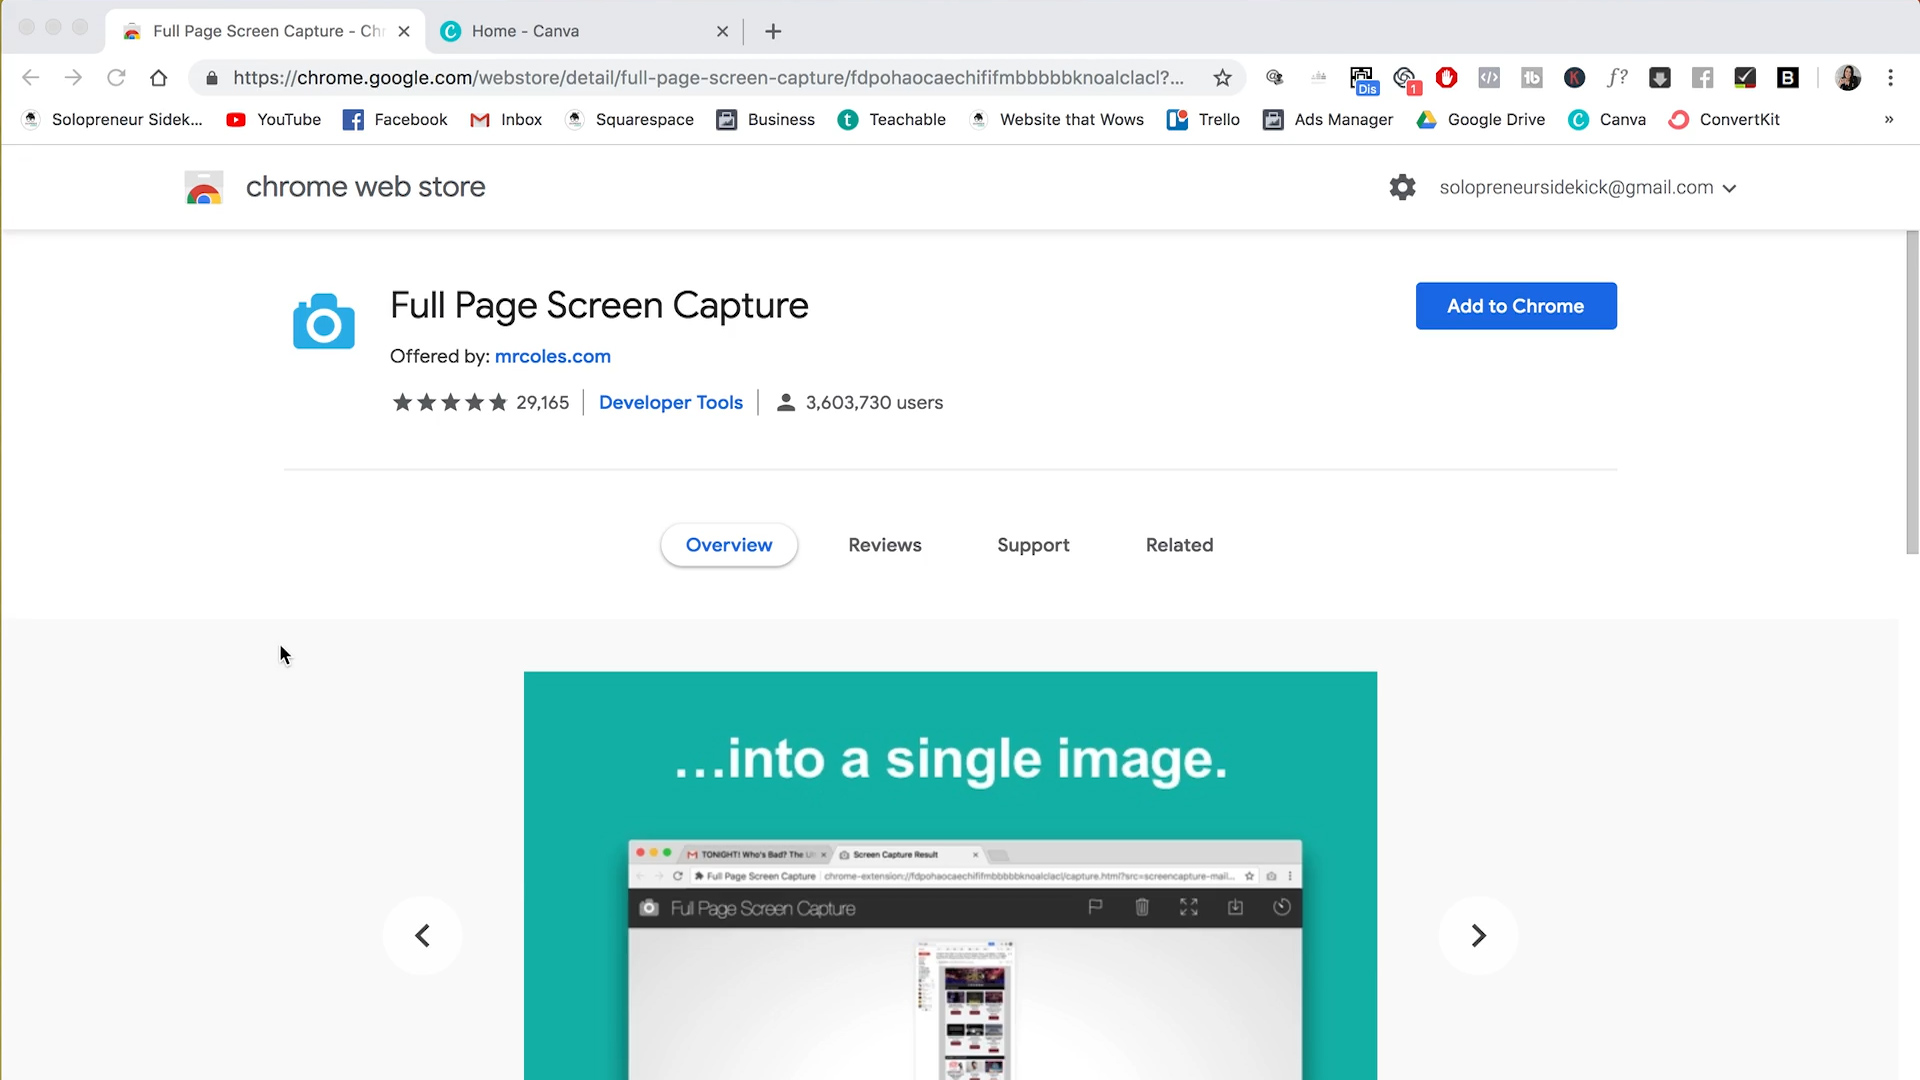
Now you'll see it has been added to the tool bar at the top of your Google Chrome browser.

Next you need to go to your website. Click on the icon for the Full Page Screen Capture Chrome extension. This will take a screenshot of your entire website.
Download the image as a PNG. Now you should have your screenshot ready to go!
Please note - if you have parallax on your website you might need to edit this image. If an unwanted grey bar shows up in the image, simply edit it out using Canva or Photoshop.
Step 2. Prepare Your Computer Graphic
The next step is to find a computer graphic to use. For this, let's go to my favorite graphic design tool for non-designers, Canva. It's totally free and you can sign up for an account and get started straight away.
After you are logged in, you're going to see this page here:
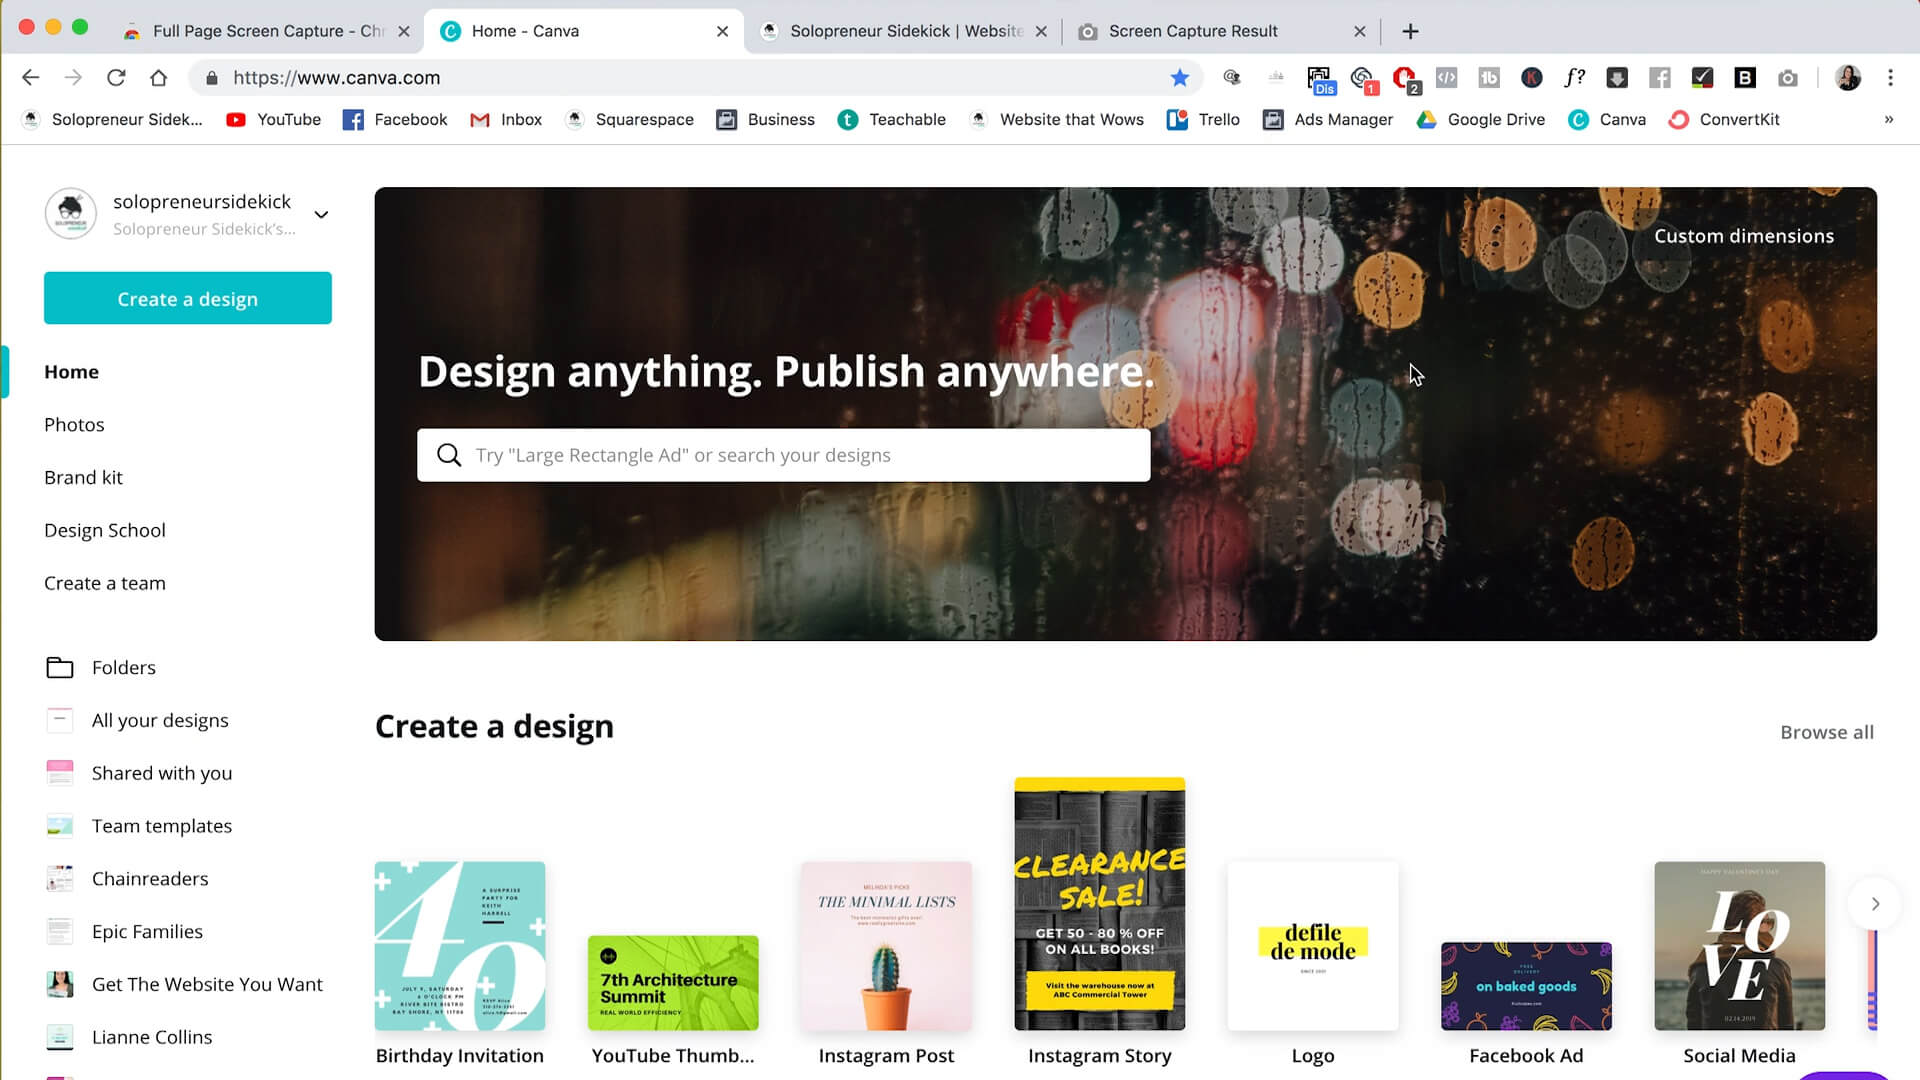
Click custom dimensions in the top right and type in the dimensions 2000 by 2000. Make sure this is px (pixels), and then click create new design.
Now the next thing we're going to do is go over to elements and then graphics and type in "computer mockup." Canva has all of these different computers that you can choose from. Some free, some are just $1, so totally worth it I think.
Once you have your graphic, download as a PNG.

Now for this next step, we are going to need to use Photoshop.
I rarely get you guys to use Photoshop in my videos, but for this one we will need it.
You can sign up for a free seven day trial to use it. And don't worry, this is a super easy function!
Okay, so this is what Photoshop looks like when you open it:

Click open on the left hand side and find your computer graphic that you just downloaded from Canva.
Once you have opened the graphic in Photoshop, find the magic wand tool which should be towards the top of the tool bar on the left hand side of Photoshop (it's a little wand with some stars around it).
If you cannot see the magic wand tool, go to to the top of the screen, select window , workspace and essentials . You can also use the keyboard short cut W.
Photoshop does have tools grouped together, so it may select the quick selection tool - just find the selected tool on the tool bar on the left, click and hold on the tool and it will show you the other tools grouped with your current selection. Here you can choose the magic wand tool.
Next come over to your screen area. Select all of the white area that is the screen of your laptop by just clicking on it. Once you have the area selected, hit the delete key on your keyboard and it will look like this:

So what we've done is make this area in the middle transparent so that we can add our animation behind it.
Click file, export, quick export as PNG and save.
This is what your graphic will look like now:

Perfect. This is going to allow us to put our animation in there.
3. Put Together in Keynote
Next we need to use Keynote, which is my favorite tool ever, and I'm now realizing how much I use this tool. I seriously have it open every day!
Start by clicking new document and then just choose the white presentation. Hit choose. This is what it looks like by default:

Drag your mouse over those text boxes and delete those.
Head over to the top right where it says document, click that and then go down to slide size. We need to change this. So go to custom slide size and change this to 2000 by 2000.
Now drag the computer mockup that you created in Photoshop into this Keynote document. And then you need to drag in your screenshot of your website that we took in the beginning.
Okay, great. So this is what it's going to look like:

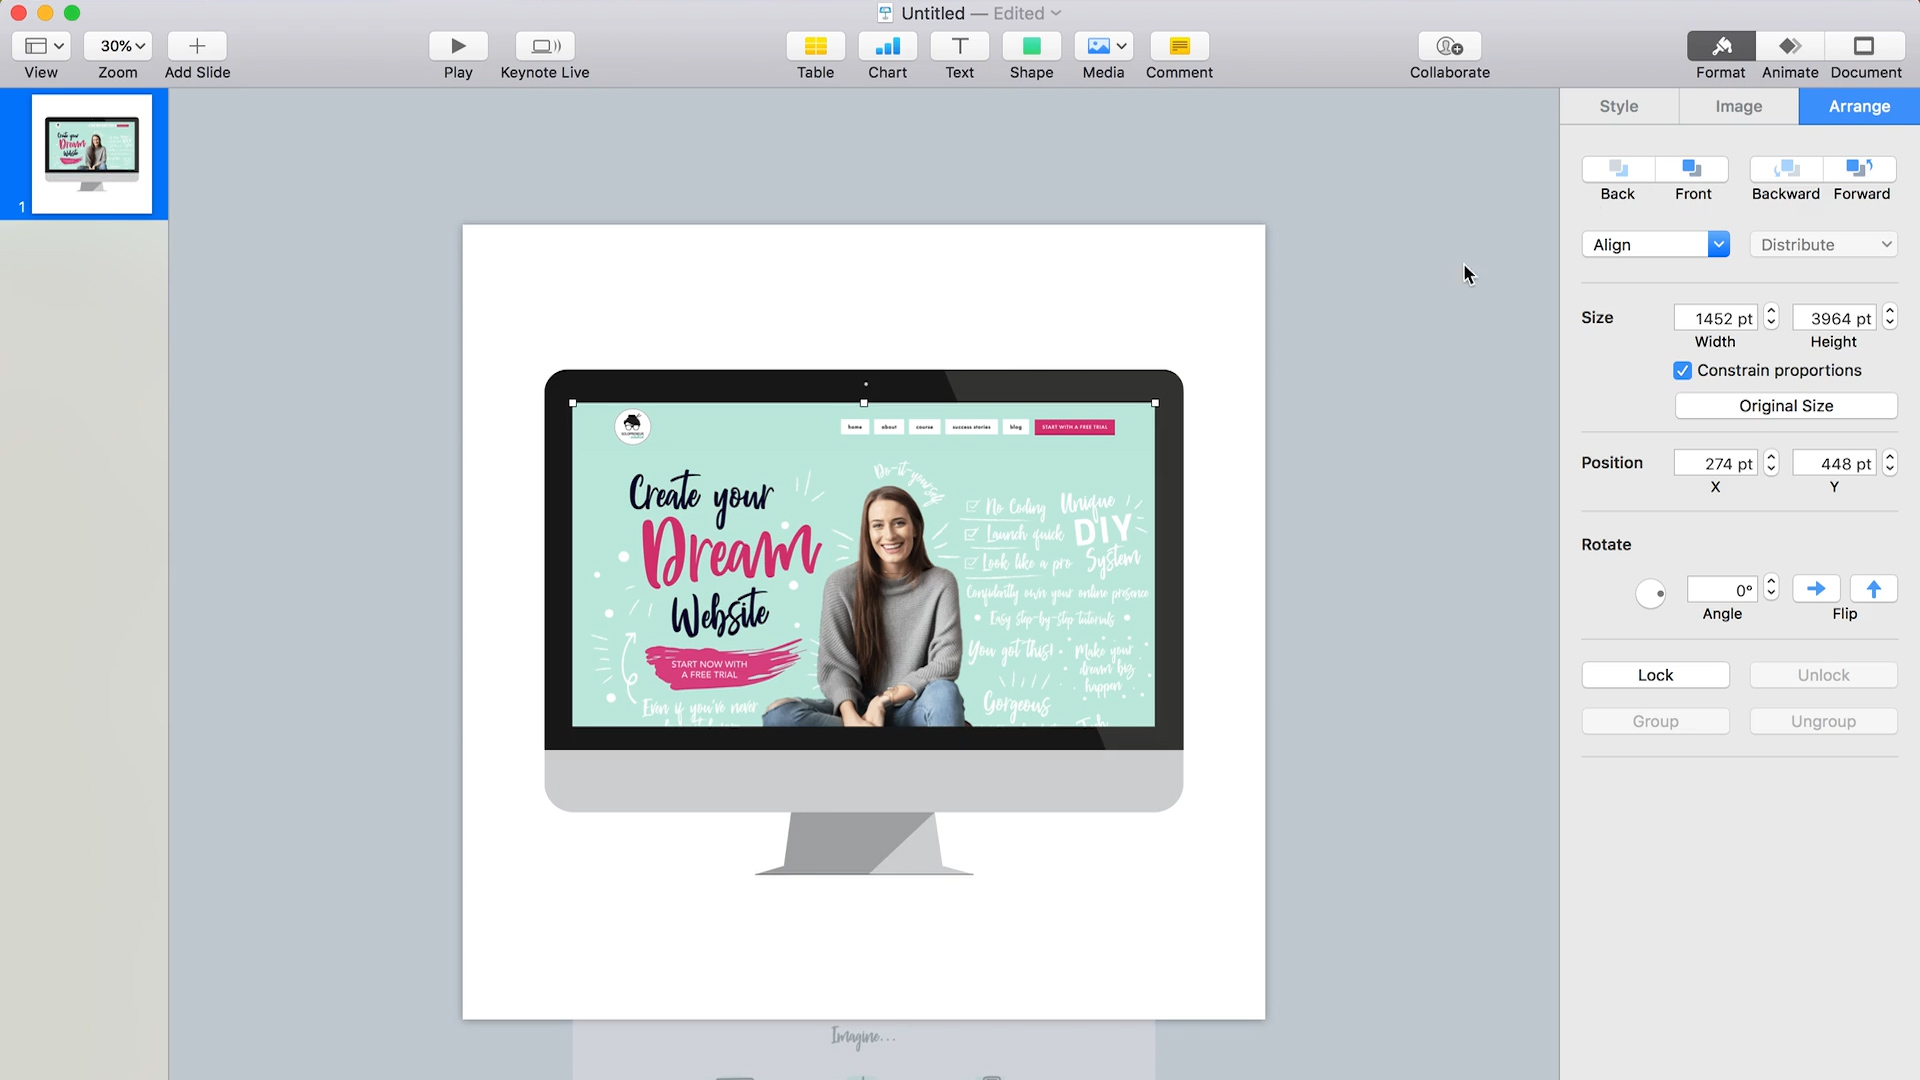
Now what we need to do is grab our screenshot of our website and resize it to fit inside the laptop screen.
Now go over to format, then arrange and click back. So that's going to fit it in our computer graphic and it will look just like a computer screen that has opened up to your website.
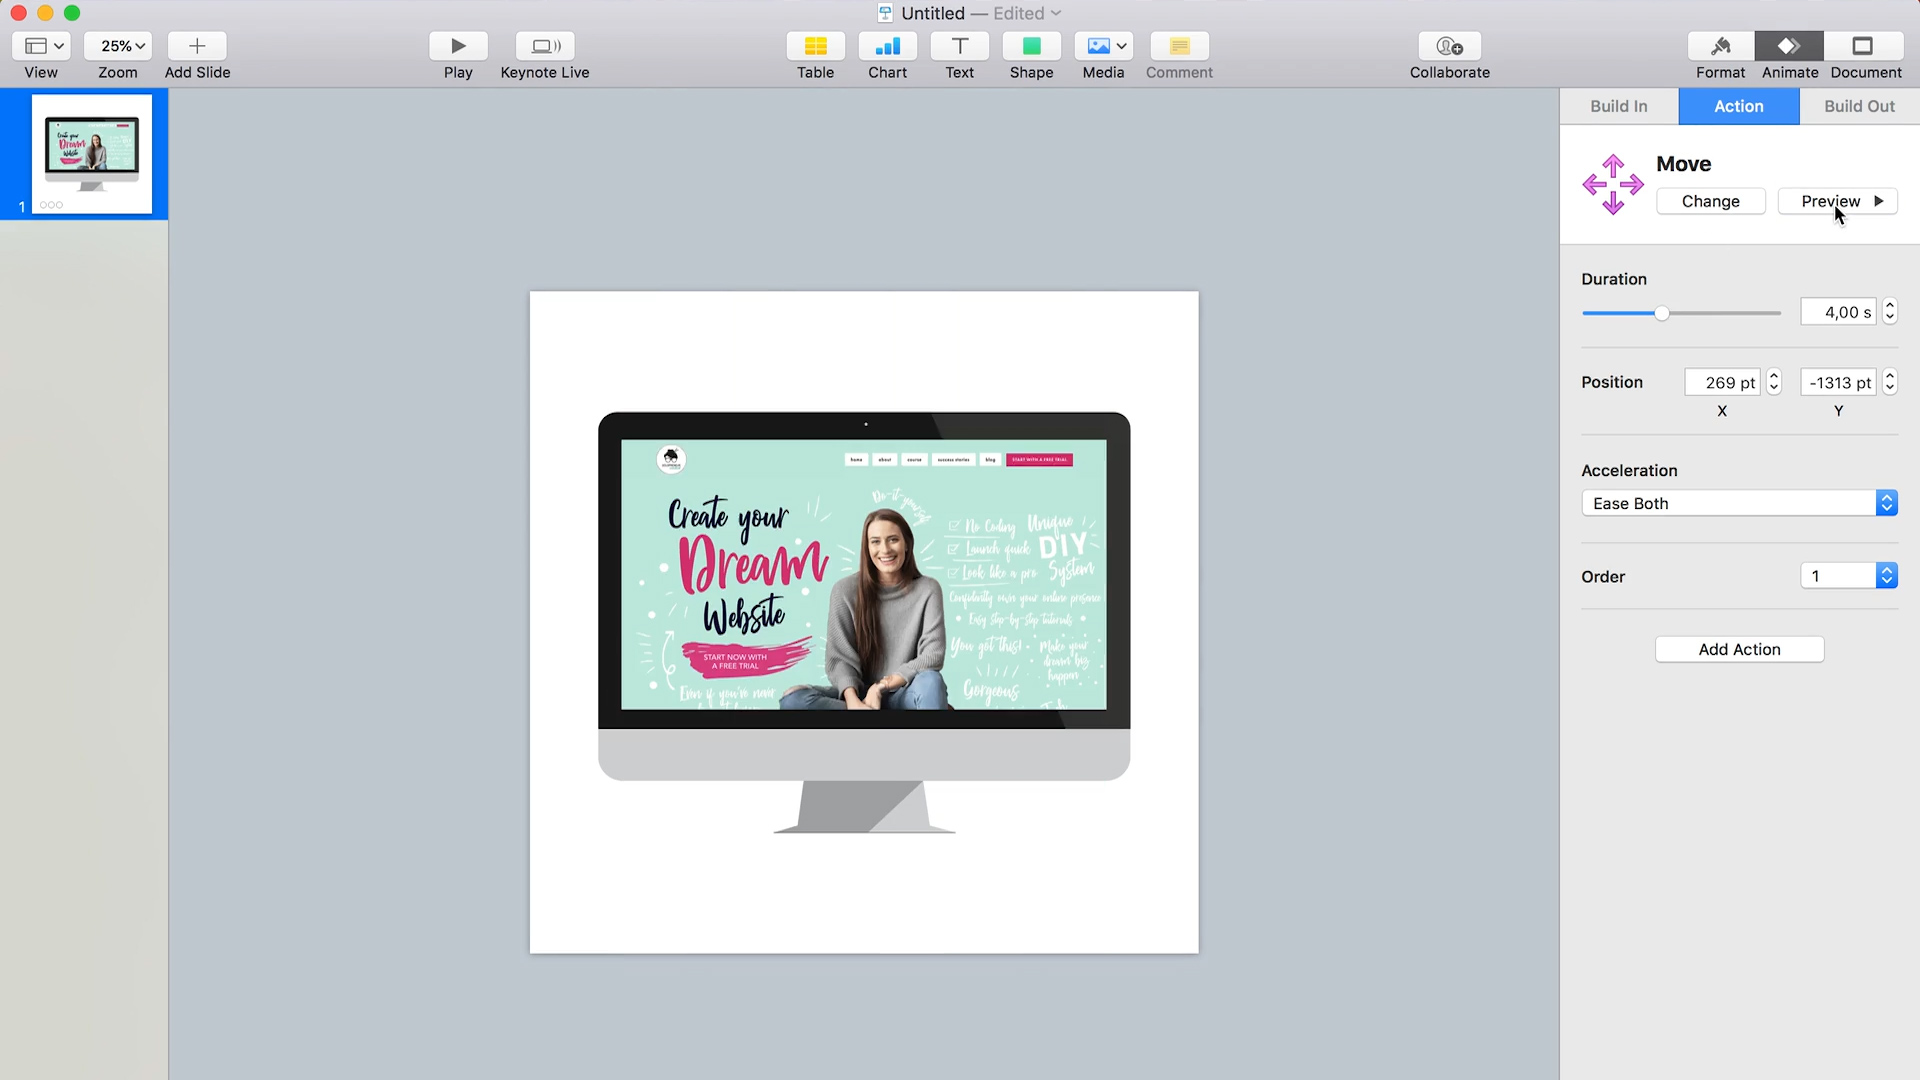
Finally we need to add the computer scroll animation. Click on your screen, then go over to animate action, add an effect, and add move.
Zoom out a little bit and you'll see this red line:

You're going to go over to the small white box on the right end of the line and just drag this back on top of the small white square on the left.
Next, drag it up in a straight line to determine how far you want it to scroll up on your site.
Then change the duration to four seconds.
Now click preview to view your computer scroll animation.
To export, click file, export to movie, change both of the self-playing numbers to zero, change a resolution to custom and change this to 2000 by 2000 pixels. Finish it off by clicking next!

Well done. Your animation is done! Go ahead, share this out on social media and celebrate your website launch.
I hope that you really enjoyed this tutorial. Definitely let me know your thoughts in the comments below. Don't forget to hit subscribe on my YouTube channel for more and I'll see you soon with another tech tutorial.
GET YOUR FREE ROADMAP HERE:

Featured

Hey, I'm Louise!
I'm a Tech Expert and Online Business Educator.
I teach entrepreneurs how to leverage tech so that they can save time, automate more and scale their business with ease.
Want to know my top 10 tools?
Download your free guide here!
WATCH MORE:

Here's what I do start to finish to edit my Youtube videos - including my fave tricks for adding animations, graphics and titles.
Read More →
Here's how to avoid those "when can you meet" emails when organizing a group meeting. The tool Doodle makes it easy to find a time that works for the whole group!
Read More →

I get asked all the time how to do this! Here's an easy way to add your phone screen recordings to your videos!
Read More →

Here's a simple Canva tutorial showing you how to achieve the hand-drawn look in your graphics!
Read More →
Here's my fave app for making your photos/videos look more pro!
Read More →

Here's how to break your YouTube video up into sections - a quick SEO and user experience improvement!
Read More →

Here is a fun + easy Instagram reel idea that you can recreate for your biz!
Read More →

Here are a few simple tricks for creating on-brand Instagram stories!
Read More →
Here's how to take your tweets and turn them into sharable instagram graphics!
Read More →
How To Create A Scrolling Website Animation
Source: https://louisehenry.com/blog/scrolling-website-animation
Posted by: beckerzekere.blogspot.com
0 Response to "How To Create A Scrolling Website Animation"
Post a Comment